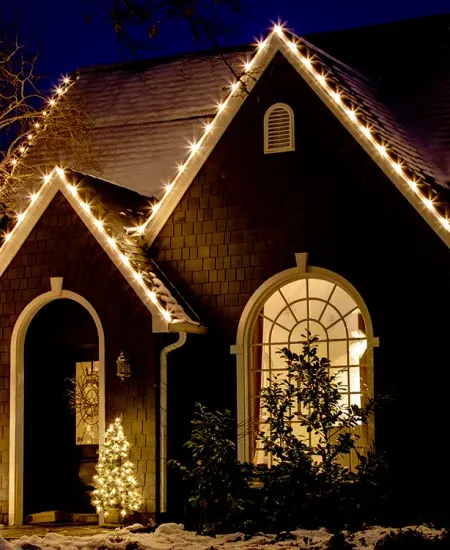
Introduction to Exterior Christmas Light Installation
Every year as the holiday season approaches, there's a special kind of excitement that kicks in. Half of that thrill for me is pulling out boxes of Christmas lights and imagining the dazzling display I’ll set up. If you’re anything like me, you might be picturing a home that gives Clark Griswold a run for his money. But as I've learned—sometimes the hard way—there's more to setting up Christmas lights than just unraveling strands and draping them over your front porch. There are mistakes to avoid and I’d love to share some pearls of wisdom to make this process smoother and more sparkly for you!
Choosing Your Lights: Keep It Safe and Smart
Let's start with picking out lights. Who knew the number of choices could be so overwhelming, right? From LED to incandescent, different wattages and colors, the options are endless. One cold December afternoon, I found myself staring at the myriad of options in the store aisle, nearly freezing like a snowman. Here’s what I’ve learned:
- Safety comes first: Always, always opt for lights that are certified for outdoor use. Outdoor lights are waterproof and more durable, designed specifically to handle winter’s harsh moods. Pay attention to the labels and certifications like UL (Underwriters Laboratories), which ensure safety standards are met. (cnet.com)
- LED vs. Incandescent: LEDs are my go-to now. Not only do they consume less energy, which is a savior for your electric bill around the holidays, but they also last longer. The initial cost might sting a bit, but it’s an investment that keeps on giving.
- Test your lights: Always test your lights before you start decorating. There's nothing more frustrating than hanging everything perfectly only to discover that half your string lights are out. Trust me, I’ve been there, and it was the closest I’ve come to knowing what a silent night truly feels like.
Prepping for the Setup: A Little Planning Goes a Long Way
One might think that tossing lights over trees and bushes is the way to go, but a bit of planning can save a lot of time and avoid potential mishaps:
- Sketch your plans: Before you start, take a good look at your yard. Better still, make a quick sketch. This might sound a bit too professional for just holiday decorating, but it helps enormously. Mark where you have power sources and where you'll need extension cords. Trying to throw lights up willy-nilly ended in me tripping over cords and an uneven display one year.
- Weigh your hanging options: To avoid damaging your home, use light clips and hangers designed for temporary holiday lighting. Avoid nails or staples, as they can damage your home’s exterior and the wires themselves. Plus, they’re a nightmare to remove! (thisoldhouse.com)
Avoiding the Tangle: Unraveling the Chaos of Strings and Wires
Ah, the dreaded tangle of Christmas lights that could possibly outmatch any puzzle. I used to chuck all my lights into a box at the end of the season, thinking I’d sort them out next year. Big mistake. Huge! Here’s how to keep your sanity:
- Store smart: After Christmas, wrap each string of lights around a piece of cardboard or a specialized reel. Label them if you can. It might seem like overkill, but it’s a gift your future self will thank you for.
- Untangle with care: If you do face a Gordian knot of wires, be patient. Pulling too hard can damage the wires or bulbs. I found playing some calming music or a holiday movie in the background makes this task a bit more cheerful.
Installing with Care: Patience is a Virtue
Now, when it comes to putting up the lights, it’s easy to get caught up in the holiday spirit and rush through things. Here’s why you might want to pace yourself:
- Check weather conditions: Never put up lights in bad weather. I learned the hard way when a gust of wind left me dangling like a bizarre Christmas ornament. Choose a calm, dry day.
- Use proper tools and help: A reliable ladder and a helping hand make all the difference. Make sure your ladder is stable and have someone hold it. As for getting the lights across the roof, teamwork is not just heartwarming, it’s safer.
- Take your time: Rushing can lead to mistakes like uneven light distribution or worse, accidents. Slow and steady ensures a beautiful display and a safer setup process.
Final Checks: The Grand Illumination
Before you plug in and light up the neighborhood, do a final walkthrough. Check that all your electrical connections are secure and that extension cords are lying flat to avoid tripping hazards. It’s also prudent to ensure that your circuit isn’t overloaded and that you’re using a good quality outdoor timer to save energy.
Conclusion: Light Up Wisely and Brightly
Setting up your Christmas lights doesn’t have to be a source of stress. With a bit of planning, the right tools, and patience, you can create a holiday display that’s both stunning and safe. Remember, every tangled string or stubborn light clip is just part of the adventure. So, here’s to a bright, delightful season filled with twinkling lights and warm memories. Go ahead, light up the exterior of your world with a little extra sparkle and a lot less fuss!
Subscribe to our email newsletter and unlock access to members-only content and exclusive updates.

Comments