Building Your Own Wooden Christmas Light Frames
There's something distinctly magical about the glow of Christmas lights during the festive season. It's like a bit of starlight wrapped around your home. While strung lights are timeless, creating homemade wooden frames can turn those bright twinkles into an artistic expression of holiday cheer. Having tried my hand at DIY projects, I can say this is one of the most satisfying yet transformative decorations you can add to your holiday arsenal.
Why Wooden Light Frames Shine Brighter
If I’m being honest, the initial draw to DIY wooden light frames was purely aesthetic. The first time I saw beautifully crafted light frames in a friend's home, I just knew I needed that unique, rustic touch to my own holiday decor. But beyond the warm, inviting look, there are practical reasons why building your own frames can be a brilliant decision:
- Customizability: Off-the-shelf lights are limited to basic shapes and sizes. When you create your own, whether it’s stars, reindeer, or even classic square frames, your creativity is the limit. If you're into themed shapes, check out how to make a DIY reindeer silhouette with lights—a great complement to your wooden frame collection.
- Durability: A well-made wooden frame is sturdy and can withstand wind, rain, and snow much better than its plastic counterparts.
- Sustainability: Using wood, especially reclaimed or leftover pieces, is a great way to reduce environmental impact compared to buying new plastic decorations or imported lights. For more eco-conscious decor, see how to repurpose old lights into new DIY decorations.
Let’s just say, once you experience the pride of saying “I made that!”, there’s no going back. It becomes a cherished part of your holiday tradition.
Gathering Your Tools and Materials
The wonderful part about diy projects is the tinkering—searching for the right tool, hunting down the perfect set of screws. For your wooden frames, you’ll need some basic supplies. Here’s what I gathered to start my project:
- Wood: Pine is great due to its softness and ease in cutting. You’ll want lengths that match the scale of your intended designs.
- Saw: Any saw will do, but I found a jigsaw to be incredibly handy for intricate designs.
- Sandpaper or electric sander: To smooth out all the rough edges causing it so as not to catch on anything or fray your lights.
- Paint or wood stain (optional): To give your frames a finished look. I went with a deep, festive red that really pops against the snow.
- Outdoor-rated Christmas lights: Ensure they’re suitable for exterior use to withstand weather conditions.
- Staple gun or clips: For attaching your lights securely to the wood without damaging them.
- Measuring tape and pencil: Precision is key in a project like this to ensure everything connects well.
Whenever I start such projects, I always find myself mixing and matching tools from previous endeavors. For instance, who knew that an old paintbrush could be revamped into a perfect app for applying stain?
Drawing and Cutting Your Masterpiece
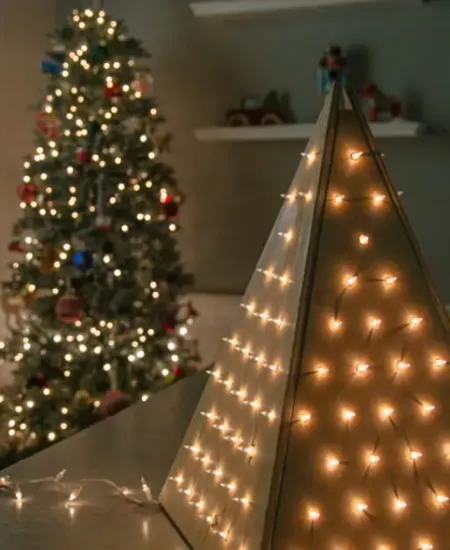
The first step in creating a wooden light frame is sketching out your design. This could be something straightforward like a star or as complex as a Christmas tree with different layers. My personal favorite? A sleek outline of a reindeer standing against the wintry sky.
Once your design is down, it’s time to cut the wood. Here’s where I’ll admit: the cutting process made me realize I needed more practice. Let’s just say the first reindeer looked more like a chubby unicorn. But persistence pays off, and soon I had a recognizable shape.
Wrapping Your Frame in Lights
Wrapping the frame is the fun part, where you see your project really start to come to life. Begin by securely fastening one end of your string lights at a corner or end point. It's better to wrap tightly and ensure that each bulb is positioned to face outward for maximum brightness. Trailing the lights around the frame and fixing them with either a staple gun (careful of the wires!) or specially designed light clips gives the best result. And here's a tip—plug the lights in as you go to catch any gaps in coverage before they become a problem.
You might also take inspiration from how to make a DIY lighted star for your roof if you're going for a more structured or symmetrical design style.
Setting Up and Showing Off
Finally, it’s time to display your work. Choose a prime location where the lights are protected from direct wind or heavy snow. Despite their durability, wood frames are best under a covered porch or against the house under the eaves. If you’re feeling particularly proud, why not add a spotlight to draw even more attention to your handiwork? (1905farmhouse.com)
Once everything’s set up, step back and enjoy the view. And when the compliments start rolling in, you can just casually mention, “Oh that? I made it myself!” Plus, if your friends get inspired to create their own, you can turn the project into a fun holiday workshop get-together. Spread the love, spread the light.
The Takeaway
Creating wooden Christmas light frames can be more than just a holiday project—it’s about bringing your personal touch to the brightest season of the year, learning new skills, and perhaps even starting a new tradition. So, why not grab those tools, brainstorm some ideas, and make this Christmas a bit more handmade? You might find that this project not only lights up your yard but also sparks a new joy in DIY that lasts all year round.
Subscribe to our email newsletter and unlock access to members-only content and exclusive updates.
Comments