Getting Started with Your DIY Christmas Countdown Display
There's nothing like the giddy anticipation of counting down the days until Christmas. But let's be honest, advent calendars and store-bought countdowns can sometimes lack that personal, joyful touch we crave during the holidays. That's why building your own DIY Christmas countdown display with lights not only adds to the festivity but can also become a cherished tradition.
Last year, inspired by a somewhat embarrassing mix-up where I strung up Halloween lights thinking they were festive Christmas globes (they were orange!), I decided to dive into making my own Christmas countdown. The laughs it brought when lit up at a Halloween party sure gave me the nudge to ensure the lights I used next were unmistakably Christmassy! (dolledupdesign.net)
What You'll Need for a Dazzling Display
Before you begin, gathering all your materials ensures a smooth, no-fuss crafting experience. Here’s what you’ll need:
- Lights: Choose LED lights for energy efficiency and brightness. You can use battery-operated fairy lights or connectable LED strings if you need more length. If you're feeling adventurous with lighting, you might even explore designing and programming Arduino-based light shows for a tech-savvy twist. (instructables.com)
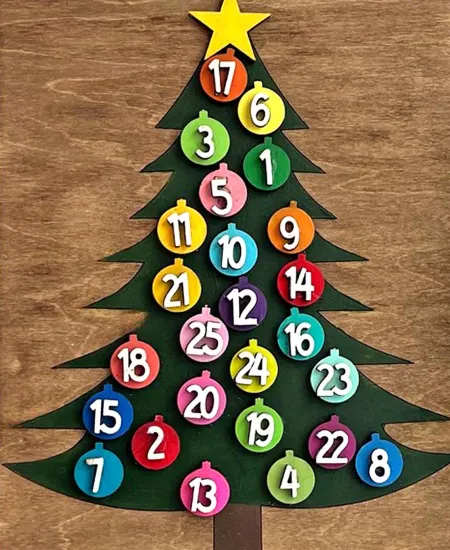
- Wooden Numbers or Stickers: You’ll need numbers from 1 to 25. You can buy these from a craft store or, if you’re feeling crafty, cut them out yourself from wood or sturdy cardstock. (dailydoseofdiy.com)
- Base Material: A large wooden board or canvas will serve as the background. Pick something that complements your home decor. (jennifermaker.com)
- Decorative Elements: Think greenery, small baubles, or even pine cones. Choose items that glue easily and add a festive touch.
- Adhesive: A hot glue gun is perfect for quick bonding and effective hold.
- Tool Kit: Basic tools like scissors, wire cutters, and maybe spray paint if you want to add color to your base material.
Pro Tip: Testing all your lights before you start your project saves you from the headache of removing and reattaching them if some turn out not to work. Been there, done that—definitely not fun! (instructables.com)
Designing Your Layout
The layout is crucial for the aesthetic appeal of your countdown. Lay your base on a flat surface and start arranging the numbers and lights without fixing them yet. This 'dry run' helps in visualizing how everything will look once completed and allows you to tweak the arrangement before anything becomes permanent.
Remember that Christmas is all about coziness and warmth, so aim for a layout that feels welcoming. I like to think of it as creating a kind of ‘visual hug’ that draws everyone’s eyes—and hearts—into the festive spirit.
If you're looking for more bold decor inspiration, check out this guide on how to make oversized ornaments with lights for your yard.
Assembling Your Countdown
Now comes the fun part—putting everything together! Begin by securely attaching your numbers. If you’re using a wooden board, a dab of hot glue on the back of each number should do the trick. With items like baubles and pine cones, see if you can integrate them into the design by placing them near or around the numbers.
Next, strategically weave the lights throughout your design. The goal is to have them enhance the numbers but not overpower them. Also, ensure your power source is accessible and safe, especially if you opt for plug-in lights. Nothing ruins the jolly mood like a tripping hazard!
Once everything is fixed, step back and give it a critical look. Adjustments might be needed, and that’s okay—it’s better to tweak now than realize later that something looks off.
Lighting Up Your Crafty Calendar
The real magic happens when you light up your countdown for the first time. There’s something truly special and celebratory about seeing your creation come to life with twinkling lights. You might find yourself adjusting the brightness or the placement a bit—it’s all part of the creative process.
When I first flipped the switch on mine, one side was dimmer than the other, thanks to a faulty light string. Thankfully, it was a quick fix, but it reminded me how important it is to have spare lights just in case. If you enjoy repurposing old materials, you might also like this article on how to repurpose old lights into new DIY decorations.
Sharing and Caring for Your Christmas Countdown
Once your DIY countdown is shining bright, it’s tempting to keep all that cozy, creative glory to yourself. But remember, part of the joy of the holidays is sharing. Invite friends and family to your unveiling, or better yet, share a photo or video tutorial online to inspire others. Your craft might just become someone else’s beacon of holiday spirit!
Caring for your display is also essential. Store it carefully after the holidays—protect it from moisture and breakage, so it’s ready to be part of your Christmas tradition for years to come. I wrapped mine in soft cloth and placed it in a secure box where it won’t get crushed.
Final Thoughts and Festive Send-Off
Overall, creating your DIY Countdown to Christmas display is more than just a holiday project; it’s a doorway to making memories. Each light you place, every number you set, brings you closer to celebrating those magical moments with your loved ones around you.
So go ahead, gather your materials, and let your creativity shine as brightly as your new festive countdown. And most importantly, have loads of fun—I sure did! Merry crafting and an even merrier Christmas to you and yours!
Subscribe to our email newsletter and unlock access to members-only content and exclusive updates.
Comments