The Magic of Custom Light-Up Signs: Brighten Your Yard with a Personal Touch
Picture this: it's December, the air is crisp, and your neighborhood is slowly turning into a winter wonderland of twinkling lights. There's something truly magical about the way holiday decorations can transform the familiar streets into scenes out of a cozy Christmas movie. And what if I told you that you could take this magic up a notch? Well, creating a custom light-up sign for your yard might just be the flair your house needs to stand out and spread cheer this holiday season.
I remember the first time I decided to dip my toes into the world of DIY holiday decor. In my head, it seemed straightforward, but as with most DIY projects, the reality was a bit more complex than anticipated. That said, the joy of seeing your custom, personally designed sign lighting up your yard is immensely satisfying. Let me share the knowledge I've pieced together over the seasons, sprinkled with tips and the occasional mishap, to help you create your glowing masterpiece. (theamericanpatriette.com)
Why Go Custom?
Before diving into the nitty-gritty of crafting your light-up sign, let's talk about why custom signs? Sure, store-bought decorations have their convenience, but they lack a certain... uniqueness. Creating a bespoke light-up sign is not just about being different; it's a personal statement. It's your way of manifesting your holiday spirit in a form that resonates specifically with you and your family.
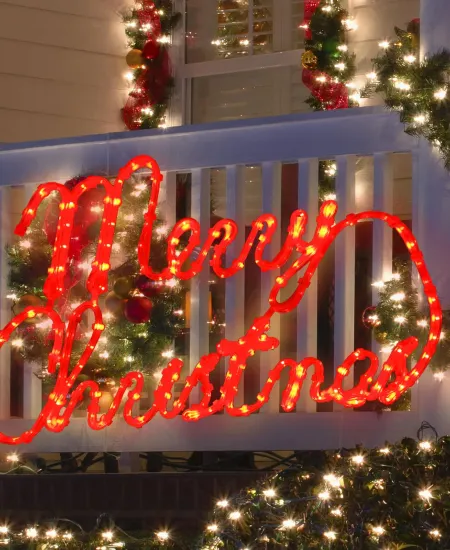
From a warm greeting to passersby with a simple "Merry Christmas" in cursive lights to more complex designs featuring sleighs, reindeer, or your favorite holiday motifs — the sky's the limit. Plus, there's the unbeatable glow of pride when neighbors pause to admire your handiwork.
Designing Your Light-Up Sign: A Blend of Art and Function
The first step is arguably the most fun: designing your sign. Start by brainstorming what you want your sign to say or depict. Are you leaning towards words, or are there specific symbols that hold special meaning for you? Once your concept is clear, sketch it out roughly.
- Keep it simple: Especially if you're a beginner, simple designs often make for more polished final products.
- Size matters: Consider the size of your yard and how visible you want your sign to be from a distance.
- Material choices: For the structure of your sign, materials such as wood, metal frames, or durable acrylics are popular. Each has its benefits and challenges in terms of weather resistance and ease of installation. (homedepot.com)
After you have your design down, it's time to think about the types of lights. LED rope lights are fantastic for outlining and come in various colors. These are durable, energy-efficient, and perfect for the sharp twists and turns your design might require. (instructables.com)
The Build: Tips and Techniques
Transforming your design from paper to glowing yard art is where the adventure really begins. If you like puzzles and a bit of DIY challenge, you'll enjoy this part—especially if you’ve tackled similar projects like making oversized ornaments with lights.
Firstly, transfer your design onto your selected base material. You can use a projector for accuracy, especially for intricate designs. Next, it's time for some precise work:
- Cut to shape: Depending on the material, use the appropriate tools to cut out your design. Safety first — always wear protective gear!
- Secure your lights: Fixing the lights can be fiddly. Use strong adhesive clips or durable tape to secure your lights along the outline of your design.
- Electrical checks: Make sure all connections are secure and waterproof. It might be worth consulting with an electrician for the wiring, especially if you're not experienced.
A personal blunder I’ll never forget — and mind you, one should always laugh at these little DIY disasters — involved me meticulously wiring everything backward. Imagine the moment of truth, the grand lighting, only to find everything twinkling in reverse! Always double-check your connections before the final reveal.
Installation and Maintenance
Installing your sign is more than just plugging it in and admiring. You need a stable setup, especially to withstand winter winds. Secure your sign deeply into the ground with stakes or mount it on a sturdy base if you're placing it on a porch.
Maintenance is relatively simple. Regularly check for any burnt-out lights and replace them as needed, especially if you're repurposing older strings—here’s how to make the most of them. After the season, store your custom sign in a dry, secure place to avoid damage and ensure it's ready for next year’s festivities.
Conclusion: Light Up the Season
Creating your own custom light-up sign is a splendid way to do more than just decorate; it's a means of expression, a project that brings together creativity, technical skills, and holiday spirit. Each year as you unpack your handcrafted sign, not only does it bring light to your yard, but also fond memories of the making process.
So here’s your takeaway: don’t shy away from trying your hand at something that could become a new tradition for your family. It’s about creating moments of joy — both in the workshop and as it brilliantly displays outside. Here's to a brighter, merrier holiday season!
Subscribe to our email newsletter and unlock access to members-only content and exclusive updates.
Comments