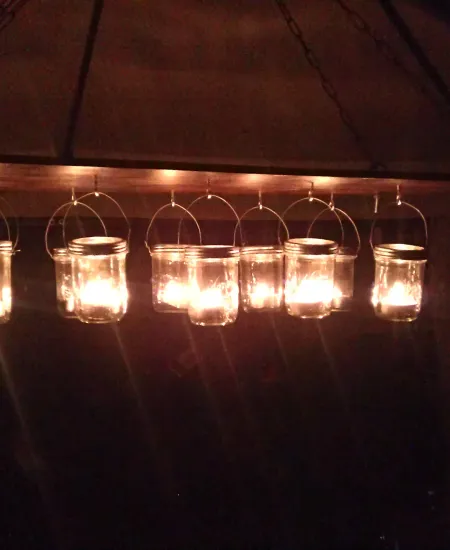
How I Crafted a Magical DIY Outdoor Light Chandelier for Christmas
Imagine this: a crisp winter evening, the air tinged with the scent of pine and the soft, warm glow of a homemade chandelier illuminating your backyard like a scene straight out of a holiday movie. That’s exactly what I wanted to create last Christmas. My journey towards crafting an enchanting DIY light chandelier for outdoor use was filled with trials, triumphs, and tons of twinkling lights. I’m excited to share this experience, sprinkled with some handy tips and detailed steps, so you can bring a bit of magic to your own holiday setup.
The Spark of Inspiration
Every year as December rolls in, I get the urge to add something unique to my holiday decor, something that feels very me. Last year, browsing through a holiday market filled with beautiful crafts, the idea struck. A handcrafted outdoor light chandelier—perfect for those who want to add an extra sparkle to backyard parties or just enjoy a cozy family dinner under the stars.
Gathering Your Supplies
The first step to any DIY project is gathering the right supplies. For outdoor lighting, especially, choosing materials that can withstand the elements is crucial. Here’s what I ended up using:
- Weather-resistant lights: I opted for LED fairy lights for their durability and energy efficiency. Make sure they’re rated for outdoor use! (nytimes.com)
- A sturdy base: I used an old, metal hoop from a barrel. Its rustic look added charm and strength.
- Weatherproof cables and clips: To safely secure everything without worrying about rain or snow.
- Decorative elements: I gathered pine cones, artificial garland, and some waterproof ribbons to add a festive touch.
- Tools: Wire cutters, scissors, and cable ties were essential for assembly.
If you enjoy bringing old or everyday materials to life for the holidays, you'll also love how to repurpose old lights into new DIY decorations.
Each choice was guided by both aesthetics and the necessity for weather resistance. Trust me, realizing mid-December that your beautiful chandelier can’t face the winter chills is not ideal!
Setting the Scene: The DIY Assembly
Clear out a workspace and lay all your materials out. The assembly process can be pretty straightforward if you follow these steps:
- Wrap the lights: Begin by securely wrapping the LED fairy lights around the hoop. Ensure even spacing to achieve that glowy, magical effect.
- Secure with cable ties: Every few wraps, secure the lights with a cable tie. This keeps them from slipping and sagging, which is crucial outdoors.
- Add the decorations: Attach the pine cones and garland using floral wire. They should be firm to prevent any wind-tossed tragedies.
- Incorporate color: Intersperse some colorful, waterproof ribbons for that festive flair. Tie them in bows, or let them dangle slightly for movement.
- Safety checks: Double-check all attachments are secure and that no electrical elements are exposed to the elements.
Patience is your friend during this process. My first attempt saw a saggy garland piece that had to be redone as it threw off the entire symmetry!
Installing Your Masterpiece
With your chandelier assembled, choosing the right spot and ensuring a safe installation are your next steps:
- Choose the right spot: Look for a spot that not only showcases its beauty but is also near an electrical source (unless your lights are battery-operated).
- Ensure it's secure: Whether hanging it from a tree or a pergola, make sure your chandelier is well-supported. Using a sturdy hook and weatherproof ropes is a must.
- Electrical safety: Double-check that all electrical connections are insulated and that extensions, if any, are rated for outdoor use.
I decided to hang mine from a large oak in our yard, which turned out to be perfect as it could be admired from inside the house too. For more structured lighting installations around your home, check out this guide on how to frame windows with lights using custom wire guides.
Lights, Camera, Action: The Grand Lighting
The true magic happens when you plug it in. The inaugural lighting of a DIY project is always my favorite part—seeing those little tweaks and personal touches light up brings an immense sense of achievement. Plus, the compliments from neighbors aren’t too bad either!
My advice? Do the first lighting with some friends or family around. It’s a celebration of your creativity and hard work, and having your loved ones oohing and aahing as the garden lights up is just priceless.
Maintenance Tips to Keep the Magic Alive
Maintaining your outdoor chandelier is key to enjoying it season after season. Here are a few maintenance tips I’ve found useful:
- Regular checks: Every few weeks, check for any loose parts or potential water damage. Early detection means easier fixes.
- Clean it seasonally: Before you store it away or after the season ends, give your chandelier a gentle clean. This prevents permanent stains or damage.
- Storage: If you’re in a particularly harsh weather area, consider storing your chandelier indoors during extreme weather or the off-season.
A Heartfelt Reflection
This DIY project not only brightened up my backyard but also added a personal touch to our holiday decor that truly made it feel like Christmas. More than the lights and the materials, it was the laughter, the occasional frustration, and the final product that made it special. Whether alone or with family, taking on a project like this can be incredibly fulfilling.
If you’re looking for a holiday project, try your hand at a DIY light chandelier. It’s a brilliant way to light up not just your yard, but also your spirit. For another fun way to count down the season, try creating a DIY countdown to Christmas display with lights.
Have fun creating, and here’s to a bright and beautiful holiday season!
Subscribe to our email newsletter and unlock access to members-only content and exclusive updates.

Comments