The Magic of Arduino in Christmas Light Shows
You’ve seen them, those breathtaking Christmas light shows that make the whole street pause in wonder as lights dance to the tune of "Jingle Bells" or "Silent Night." Maybe you’ve wondered, "How on earth do they do that?" Well, what if I told you that you could create your own mini spectacular right in your front yard, and it’s not as complex as you might think? The secret ingredient? Arduino.
My journey into the world of Arduino-based light shows started three years ago during a rather ambitious moment of holiday spirit. Wanting to add a wow factor to our somewhat traditional holiday decor, I stumbled upon Arduino technology. Now, let me take you through the basics of designing and programming your own Arduino-based light show, ensuring your holiday decorations will be the talk of the town.
Understanding Arduino and Its Role in Light Displays
First things first, let’s clarify what Arduino is. Simply put, it’s an open-source electronic platform based on easy-to-use hardware and software. Arduino boards are able to read inputs - light on a sensor, a finger on a button, or a Twitter message - and turn it into an output - activating a motor, turning on an LED, publishing something online. You can tell your board what to do by sending a set of instructions to the microcontroller on the board. For holiday lights, it translates to controlling hundreds, even thousands, of lights to blink, fade, or change color on cue.
The brilliance of using Arduino in holiday lighting lies in its flexibility and the power of customization. With the right setup, you can orchestrate a show that rivals Clark Griswold’s in "National Lampoon’s Christmas Vacation"—but hopefully with fewer hitches.
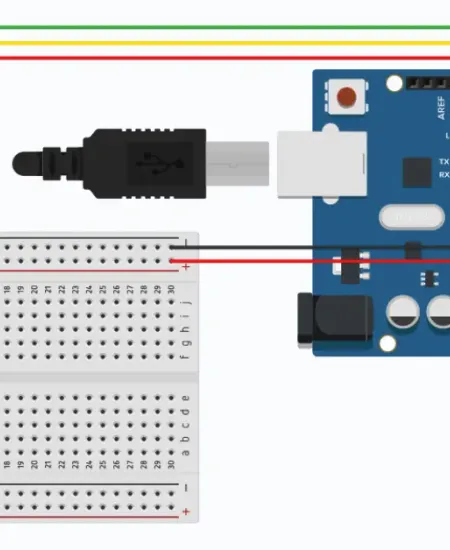
Gathering Your Materials
Before you get started, here’s what you’ll need:
- Arduino Board: A popular choice is the Arduino Uno, due to its size and the large amount of resources available for beginners.
- LED Lights: You can choose from strip lights, string lights, or even pre-made light grids depending on your project scope.
- Relays or MOSFETs: These are used for controlling the high power required by your lights.
- Resistors and Wires: Essential for connecting and protecting your components.
- Power Supply: Make sure it matches the voltage and current requirements of your lights.
- Software: Arduino IDE (Integrated Development Environment) to write and upload your code.
I remember vividly standing in the electronics aisle, completely baffled by the variety of components. If you’re feeling overwhelmed, take a deep breath. You're just at the beginning of a gratifying journey.
Designing Your Light Show
Designing your light show can be as simple or as complex as you like. You might start with mapping out where each light strip or string will go. Sketch your yard and place where each lighting element will be located. Think about safety and power sources too—it’s not much fun if your setup trips every circuit in the house!
Software like xLights or Vixen Lights can help you visualize your light display on your computer before you set it up. (xlights.org)
This can be a game-changer in planning the sequences and ensuring the final result is exactly what you envisioned. For inspiration beyond lights alone, consider combining your show with other creative projects like making light-up candy canes from pool noodles.
Programming Your Show
The real fun begins when you start programming your Arduino to control the lights. If you’ve never dabbled in coding before, it might look a bit daunting at first. The Arduino programming language is based on C/C++, but thanks to a plethora of online communities and tutorials, you'll find yourself writing your first few lines of code in no time.
The basic concept is to control the lights by turning the digital pins on your Arduino board HIGH (on) or LOW (off) at specified intervals. Here’s a simple code snippet to get a single light blinking:
```cpp void setup() { pinMode(13, OUTPUT); } void loop() { digitalWrite(13, HIGH); delay(1000); digitalWrite(13, LOW); delay(1000); } ```
This code will turn an LED connected to digital pin 13 on and off every second. Imagine coordinating multiple LEDs to create patterns and music synchronizations!
Testing and Tweaking
Once your design is laid out and your initial programming is done, it’s time for a test drive. Start with a small section of your lights to test each element of your show—believe me, it’s easier to troubleshoot with ten lights than with ten thousand.
During my first setup, I learned the hard way that outdoor conditions can play havoc with electronics. Waterproofing your connections and considering environmental factors such as moisture and temperature will save you a lot of troubleshooting. For broader ideas on outdoor setups and creative uses of lighting, check out how to repurpose old lights into new DIY decorations.
Practical Takeaways and Concluding Thoughts
Embarking on creating your own Arduino-based light show for Christmas is a thrilling project that blends creativity with technology. The satisfaction of watching your creation come to life, synchronized to your family’s favorite Christmas tunes, is truly unmatched.
Here are a few parting tips:
- Start small and scale gradually. Your first project doesn’t need to be seen from space—even a single tree or hedge outlined in lights can be magical.
- Involve family or friends. Building the light show can be a fun holiday project for everyone, and you’ll make great memories along the way.
- Learn from each season. Each year, you can add more complexity to your show based on your growing confidence and skills.
With some patience and practice, you'll not only light up your yard but also brighten your community's festive spirit. For more ideas on impactful holiday setups, take a peek at how others are building outdoor nativity scenes with lights.
Happy tinkering, and may your holidays be merry, bright, and brilliantly lit!
Subscribe to our email newsletter and unlock access to members-only content and exclusive updates.
Comments