Turning LED Strips into a Magical Christmas Projector Light
Hey there! Today, I’m excited to dive into a little DIY project that’s perfect for the holiday season—making a custom projector light from LED strips. Picture this: soft, glowing patterns dancing on the walls during your holiday dinners or lighting up your front yard with festive designs. Sounds pretty magical, right?
But before I get into the nuts and bolts, let’s chat a bit about why you might want to tackle this project. Last Christmas, as I stumbled through heaps of tangled fairy lights and dodged the ever-teetering Christmas tree, the idea of creating something new, something simpler yet still festive struck me. It's not only fun but also gives your decorations a personal touch that's sure to catch the eye of every guest or passerby.
What You’ll Need to Get Started
First off, let’s talk materials. Luckily, everything needed for this DIY project can be easily sourced from your local hardware store, or perhaps even lying around in your junk drawers! Here's what you'll need:
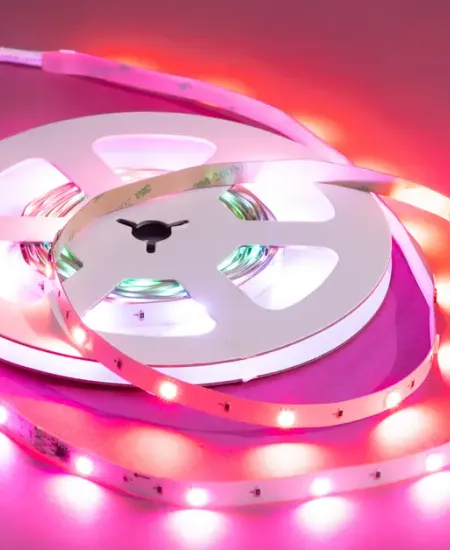
- LED Strip Lights: You can choose any color you like, but for that classic Christmas glow, red, green, or white work wonderfully.
- Old CD Cases: These will act as the 'lens' for your projector.
- Cardboard: To create the frame of your projector.
- Craft Knife and Scissors: For all your cutting needs.
- Glue Gun: For assembling parts securely.
- Transparent Tape: Useful for combining items that you prefer not to glue.
- Christmas-themed Stencils: To shape the patterns your light will project. You can find these online or craft them yourself!
Once you've rustled up these items, you’re ready to move on to the fun part—putting it all together.
Step-by-Step Guide To Crafting Your Projector Light
The process isn't daunting; I promise! It’s more about enjoying the act of creation. Below is a simple guide to help you turn these ordinary objects into something extraordinary.
Step 1: Prepare the Frame
Start by cutting the cardboard into two squares or rectangles—these will serve as the front and back of your projector. The size depends on how big or small you want your projector light to be. I went with 12x12 inches, which I found to be quite manageable.
Step 2: Fix the LED Strips
Take your LED strips and carefully line the inner edges of one of the cardboard pieces. You want to arrange them in a circular or spiral pattern to maximize the light distribution. Secure them in place using the glue gun. This will also ensure they don’t sag or shift when upright.
Step 3: Create the Projector Lens
Next, take the CD cases and remove the clear plastic part. Using a craft knife, cut it in a shape that fits within the cardboard frame. Stick your Christmas stencil on the plastic. If you feel creative, you can craft multiple lenses with different designs to switch up the patterns projected!
Step 4: Assemble Your Projector
Align your lens over the LED-lit cardboard, ensuring that the stencil faces the exterior. Now, glue or tape the second cardboard piece to create a sealed box. Make sure all edges are secure to prevent light from leaking out and spoiling the projected pattern.
Step 5: Power It Up
Plug in the LED strips—most come with their own power adapter—and watch your creation come to life! Adjust the focus by moving the lens closer or further from the LEDs inside until the projected image sharpens to your satisfaction.
Making the Most of Your New Projector Light
Now that your projector is ready, the question is: where should you shine this new creation? I placed mine facing a blank wall during our Christmas party last year, and it was a total hit. The kids especially loved seeing the colors change. Or, if you’re feeling adventurous, set it up near a window to project out onto your lawn for some jaw-dropping outdoor decorations.
Here are a few tips on placement:
- Indoors: Avoid places with a lot of ambient light to ensure your projections stand out. Dimly lit areas work best.
- Outdoors: Make sure your projector light is shielded from the elements. A little creativity with waterproofing can go a long way.
Parting Thoughts
Creating your own DIY projector light from LED strips is not just about saving money, but it’s also about crafting moments and memories. The twinkle in the eyes of your loved ones as new patterns emerge on the wall, or perhaps the chuckles when patterns wobble as you adjust your makeshift lens, are what really turn the holiday season magical.
So, why not give it a whirl this Christmas? Embrace the joy of DIY, and maybe even start a new holiday tradition. Here's to a brightly lit, heartwarming festive season filled with your very own, unique decorations!
Subscribe to our email newsletter and unlock access to members-only content and exclusive updates.
Comments