Embarking on a Festive DIY Project: Candy Cane Pathway Lights
Remember those childhood Christmases, filled with the twinkling of lights and the unmistakable red and white stripes of candy canes hanging from trees and lining the walkways? This year, why not recreate that magical feeling with a personal touch? Building your own candy cane pathway lights isn't just a fun festive project; it's a pathway back to those cherished memories. Plus, you get to brag a little at your holiday gatherings, right?
I recently dove into this project myself, and let me tell you, it was a mix of exciting, a bit challenging, and extremely rewarding. Below, I’m going to walk you through how you too can create this whimsical decoration, complete with all the little turns and pitfalls I encountered along the way.
The Blueprint: Designing Your Candy Cane Pathway Lights
First things first, you'll need a game plan. How long is your pathway? How many candy canes do you want? Do you want them flashing or steady? These decisions will dictate the materials you need and the scope of your project. Here's how I figured it out:
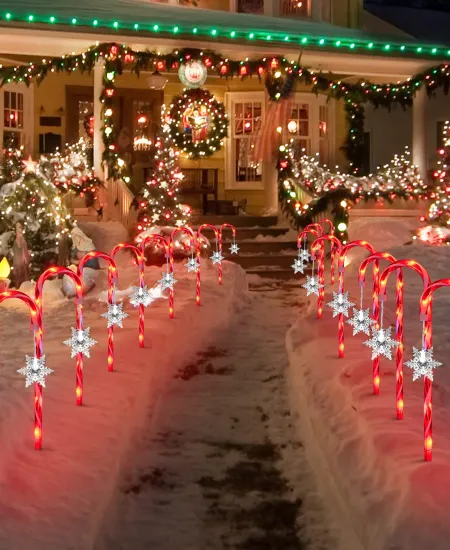
- Measure your pathway: It’s wise to walk along your path and measure how long it is, so you can decide how many candy canes you'd like along the route. I chose to place a candy cane every 2 feet along my 20-foot garden path, needing 10 candy canes in total.
- Sketch your design: Nothing fancy, a simple sketch on a napkin will do! It helps to visualize where everything will go and how it will look. This step stopped me from buying too many materials.
- Decide on the lights: I went with LED strip lights because they’re energy-efficient and bright. You’ll need to calculate how much you'll need based on your design. For each candy cane, I used about 3 feet of LED lights.
Don’t skimp on sitting down and going through your plan—it can save you loads of time (and returned products) later on.
Gathering Your Tools and Materials
Once your plan is set, it’s time to gather your materials. This is where you can personalize your project with choices that reflect your taste and the overall feel of your holiday décor. (eufy.com)
Here’s what I used:
- PVC pipes: These are great for the candy cane structure because they’re sturdy and easy to bend with the right tools. I chose ¾ inch pipes.
- Red and white tape: This is what gives the PVC pipes that iconic candy cane twist. Alternately, you could use paint, but I found tape to be less messy and more forgiving.
- LED strip lights: Opt for the waterproof variety if your candy canes will be exposed to the elements.
- Heat gun: This is needed to gently heat and bend the PVC pipes into a candy cane shape.
- Sandpaper, scissors, and other basic tools: Always handy in any DIY project.
Pro tip: Check online for bulk deals on materials like PVC pipes and LED lights—you can save a lot if you shop smart!
Making the Magic Happen: Constructing Your Candy Canes
This is where the rubber meets the road. Or rather, where the PVC meets the LED. Follow these steps to start constructing your pathway lights:
- Heating and bending the PVC: Using the heat gun, warm the PVC pipe sections carefully before bending them into the cane shape. This part took me a few tries to get right, so don’t get discouraged if it doesn’t come out perfect the first time!
- Applying the tape: Start wrapping the tape from the top of your cane, alternating between red and white. Make sure to overlap each layer slightly to prevent any gaps. It’s surprisingly therapeutic.
- Attaching the lights: Stick the LED strips along the length of each cane, ensuring that the whole structure is evenly lit. Then, secure the ends with a small, weather-proof enclosure to keep moisture out.
One handy hint: work on a flat surface and keep checking that your lights are working as you install them. It’s a real gut-punch to finish all that work only to find out nothing lights up!
Installation Tips for Dazzling Results
With your candy canes ready, you’re nearly at the finish line. Here’s how to install them along your pathway for the best effect:
- Spacing: Measure out and mark where each candy cane will go. Consistent spacing is key to a harmonious look.
- Securing the canes: If you’re like me and not keen on making permanent changes, you can use garden stakes and zip ties to secure each cane in place. This method also allows for easy adjustments and removal after the holidays.
Switch them on at dusk, and watch as your creation comes to life, brightening up the winter evenings and possibly making your neighbors a bit envious of your fabulous DIY skills.
A Parting Piece of Holiday Cheer
There’s something profoundly satisfying about creating something from scratch, especially when it lights up not just your yard, but also the faces of friends and family who visit. This project, while testing my patience at times, taught me a lot about the joy of making rather than buying.
If you’re on the fence about starting this project, I say go for it. Not only will you end up with unique decorations, but you’ll also have the warm, fuzzy feeling of accomplishment every time you see your candy cane lights glowing. Happy crafting, and may your holidays be merry and bright!
Subscribe to our email newsletter and unlock access to members-only content and exclusive updates.
Comments