Transforming Your Windows with Lights: A Step-by-Step Guide to Using Custom Wire Guides
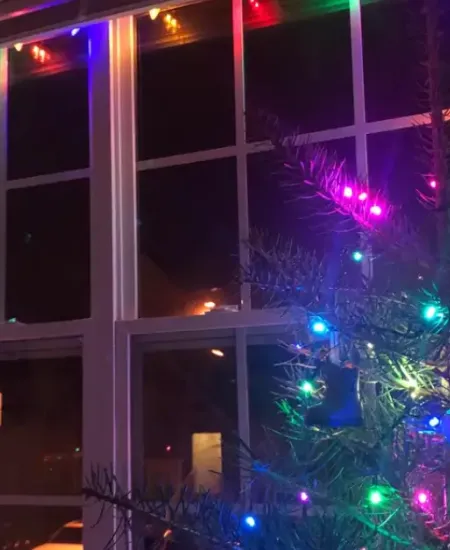
When the holiday season approaches, nothing quite sets the festive mood like the soft glow of twinkling lights around a window. Imagine sipping your morning coffee and looking out a window that frames the chilly outdoors with a warm, inviting light. If you’ve tried hanging lights before, you know that getting them to stay up—and look good—can sometimes feel like you’re trying to decorate with cooked spaghetti. This year, I decided to ditch the frustration and opt for something a bit more professional: custom wire guides.
Maybe you’re wondering, "What on earth is a wire guide?" Well, let me tell you, it's a game changer. Here’s how I stumbled upon this savvy solution and turned my knack for clumsy setups into a display that even my perfectionist neighbor admires.
Understanding the Basics of Wire Guides
Before diving into the twinkling world of lights and ladders, let’s get the basics down. Wire guides are exactly what they sound like—guides made of wire that help you position and secure your lights exactly where you want them. They come in various lengths and can be custom-fitted to match the contours of your windows. Here’s what I found out when I started my project:
- Durability: These wires are tough! They can stand up to wind, rain, and even the curious paws of my cat who has a thing for shiny objects.
- Versatility: Whether you want a simple outline or a more intricate pattern, wire guides bend to your will—literally.
- Reusability: Invest once and use them year after year. This was a big plus for me, considering the graveyard of adhesive hooks in my junk drawer.
Turns out, this isn’t just about making things look pretty; it’s also about saving time and sanity in the future. No more uneven lines or lights that drop off in the middle of the night with a crash loud enough to wake Santa! So, let’s get into how you can achieve this magical setup, too. (groundsguys.com)
Choosing the Right Materials
The first step is choosing the right wire guide for your needs. Here’s a rundown of what I learned:
- Measure Your Window: Grab a tape measure and jot down the dimensions of your window. Don’t just eyeball it—I made that mistake, and let's just say I underestimated my window's size. Twice.
- Select the Wire Type: Stainless steel is popular for its strength and rust resistance. Aluminum, though lighter and more flexible, can handle fewer lights.
- Clips and Fasteners: You’ll also need clips or other fasteners to attach the wire to the window frame. Choose ones that are easy to install and remove. (instructables.com)
With the specifics in hand, imagine the outline of glowing lights around your window. Are they white and elegant? Colorful and fun? The setup you’re aiming for will influence the materials you pick. If you’re working with bold or oversized decor elsewhere, this could also complement larger features like oversized ornaments with lights for your yard.
Installation Magic: Framing Your Window with Lights
Now, for the part that transforms your average window into a spectacle of holiday cheer. You’ll need your wire, clips, a drill (depending on the clips), and lights. Here’s my step-by-step guide:
- Planning: Sketch out your design on a piece of paper. This roadmap will save you from wandering in the wilderness of tangled lights.
- Attaching the Clips: Position the clips evenly around the window frame. Make sure each one is secure before hanging the wire. (instructables.com)
- Threading the Wire: Carefully thread the wire through the clips, following your blueprint. This is where patience pays off. (woodinvillewonderland.com)
- String the Lights: Attach the lights to the wire. Start from one end and work your way to the other, ensuring that each light is firmly attached. This isn't a twister game—no overlapping!
- Power Source: Connect your lights to a power source. I recommend using an outdoor-rated extension cord if your outlet isn’t close by.
Step back and flick on the switch. Voilà, you’ve just elevated your home’s curb appeal with a stunning light display that didn’t involve any swearing or last-minute runs to the store!
Additional Tips and Ideas
Now that you've tackled the main construction, here are a few extra tips to enhance your display:
- Timer: Add a timer to your lights to ensure they turn on and off at your preferred times. It's a great way to save on your electric bill and enjoy the lights exactly when you want them.
- Variety: Mix and match light types for depth. Use bigger bulbs for a bold outline and smaller fairy lights for a delicate fill.
- Safety: Ensure all connections are secure and use weatherproof products to avoid any electrical hazards.
Looking for more unique window and home accent ideas? Try creating a DIY countdown to Christmas display with lights as a complement to your illuminated windows.
Custom wire guides have turned my seasonal decorating from a task I dreaded to an activity I cherish. Plus, the efficiency and neatness have granted me time for more important things—like baking cookies and crafting with the kids.
Final Thoughts: Lighting Up Your Holiday Spirit
Installing window lights doesn't have to be a battle against gravity and tangled wires. With a bit of preparation, the right tools, and custom wire guides, you can create a holiday display that brings joy to your heart and sparks wonder in your neighbors' eyes. More than just decorations, these are beacons of the holiday spirit, shining brightly from your home.
So grab your supplies, draft your plan, and light up your home with a custom touch that tells the world you’re ready to celebrate.And who knows, maybe you’ll inspire someone else to take their holiday decorating to the next level this year. Happy decorating!
Subscribe to our email newsletter and unlock access to members-only content and exclusive updates.
Comments