The No-Drill Magic: Hanging Lights around Windows and Doors
Remember the year when I decided to turn my living space into a winter wonderland and ended up with more holes in the walls than in a block of Swiss cheese? Well, learn from my mistakes because this time around, we’re decorating without leaving a single mark — well, except for the dazzling marks of lights around our windows and doors!
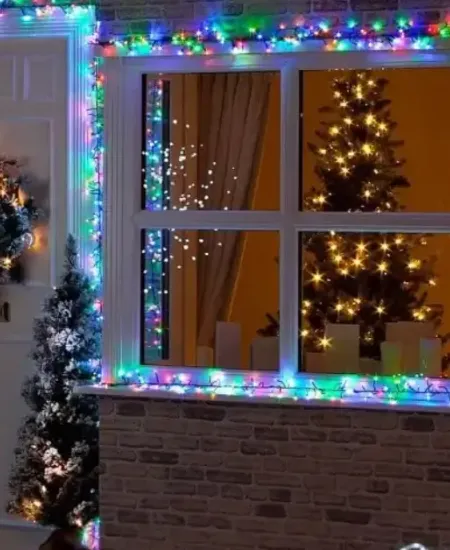
Decking our halls (and windows, and doorframes) with strands of twinkling lights can truly transform a home into a festive sanctuary. Still, many of us shy away from or outright struggle with this part of holiday decorating simply because we want to avoid damaging our walls. We all love our deposit money, right? But here’s the good news: there are several ways to hang your lights with absolutely no drilling required. Let’s dive into how you can achieve this with some creativity and a few handy helpers.
Understanding Your Framework
Before you start, take a moment to really look at the areas you want to decorate. Are your window frames wooden, vinyl, or aluminum? What about the door frames? The type of material will determine the best method for hanging lights without damage. Don’t worry—I’ve got tricks up my sleeve for all types!
If you're working with wood or vinyl, you'll want to use light clips that can gently grip without leaving marks or residue.
The Magic of Adhesive Hooks and Clips
Adhesive hooks and clips are like the Swiss Army knife for holiday decorators who dislike drilling. Here's a step-by-step guide to using these nifty gadgets:
- Choose the Right Product: Go for hooks and clips designed specifically for the outdoors if they will be exposed to weather, and make sure they can handle the weight and type of lights you're using. They’re a great choice if you're aiming to weatherproof your display.
- Clean the Surface: This might sound like your mom nagging, but honestly, cleaning the surface where you'll stick the hooks is crucial. Just a quick wipe with alcohol or a soapy water solution will do. Let it dry completely to ensure the adhesive will stick properly.
- Plan Your Layout: Lay out the lights on the floor to measure how many hooks or clips you’ll need. It’s like playing a less stressful version of Tetris.
- Attach the Hooks: Follow the instructions on the package for attaching the hooks. Most will tell you to press firmly and then let them sit for an hour or so to ensure a good bond.
- Hang Your Lights: Once your hooks are secured, gently hang your lights. Try not to tug or pull too hard to avoid weakening the adhesive.
A little tip from my own experience: remove these hooks gently at the end of the season, preferably by warming them slightly with a hairdryer. This trick lessens the risk of pulling off any paint or finish. If you're planning ahead, don't forget about proper storage when the season ends.
Using Tension Rods: A Subtle Method
For those who aren’t fans of even the smallest stick-on hooks, tension rods might be your savior. They are perfect for hanging lights around windows especially:
- Finding the Perfect Fit: Measure your window frame, and find a tension rod that fits the width.
- Wrap the Lights: Before putting up the rod, wrap your lights around it. This way, you avoid having to balance on a ladder while dealing with tangled strands.
- Adjust and Fit: Place the rod in the window frame and adjust it to the tension required to hold it in place securely.
Voilà! You now have a magically floating string of lights with no clips in sight. The tension also means it’s a breeze to take down—just unwind and store away.
Magnetic Attraction for Metallic Frames
Now, if you’re lucky enough to have metal around your windows or doors, you can use magnetic hooks or clips. (reddit.com)
These are superb as they require literally zero prep work:
- Check Magnet Compatibility: Just because a frame looks metallic doesn’t mean it’s magnetic. Test it with a fridge magnet to ensure it will hold.
- Choose Strong Magnets: Look for neodymium magnets, which are incredibly strong and perfect for holding heavier decorations.
- Hang Lights with Ease: Attach your lights by simply clipping them onto the magnets. Easy to move and adjust, these are ideal for those of us who change our minds about décor every five minutes.
And from personal mishaps: keep these strong magnets away from electronic devices and credit cards. Trust me, it’s not the festive surprise you want.
Final Twinkling Thoughts
Whether it’s the charm of a softly lit window sill or the welcoming glow around a door, lights truly make the holiday season bright and merry. Knowing how to hang these beauties without any drilling can save your walls and your sanity (speaking from a wall full of past drilling regrets here).
If you're wrapping things up at season’s end, be sure to take down your lights with care to avoid any snags or damage.
So remember, with the right tools — be they adhesive strips, tension rods, or magical magnets — your holiday decorating can be as temporary as the season yet leave a lasting impression all winter long. As you light up your home, remember that each sparkle is a reflection of your own creativity and innovation. Now, go forth and turn those dark windows and doorways into frames of festive joy, no drill or damage in sight!
And don't forget, take your time, enjoy the process, and maybe listen to some festive tunes while you work. After all, it’s not just about the result—it’s also about the delightful memories you create while decking the halls. Happy decorating!
Subscribe to our email newsletter and unlock access to members-only content and exclusive updates.
Comments