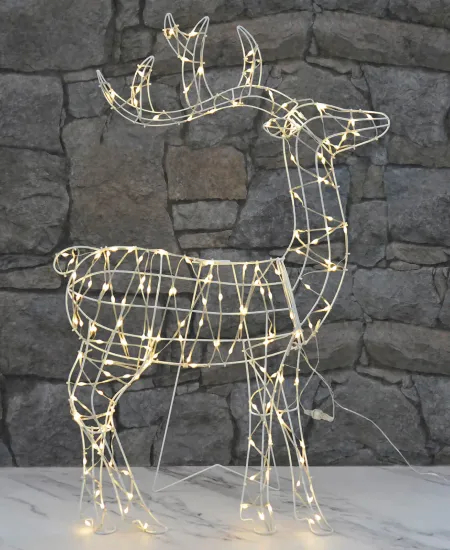
Embarking on a Festive DIY Journey: Crafting a Reindeer Silhouette with Lights
There’s something magical about making your own Christmas decorations. Maybe it's the way glitter ends up not just on the project but also, somehow, in your hair and even on your dog. Or it could be the sense of accomplishment when you switch on the lights, and your creation comes to life. Today, I’m taking you through a fun, festive DIY project: a reindeer silhouette adorned with lights. Perfect for adding that special glow to your porch or living room!
Before diving into our project, let me assure you this isn’t rocket science. You don’t need to be a carpentry wizard or an electrical engineer. If I can do it, so can you—and I’m someone who once managed to glue myself to... well, myself. Let’s just say DIY is more about spirit than skill!
Gathering Your Supplies: What You’ll Need
First things first, we need to gather our materials. Here's what you'll need:
- Plywood: A large sheet, about 4 feet by 6 feet should do the trick. This will serve as the base of our reindeer silhouette.
- Jigsaw: This is what you’ll use to cut out the reindeer shape from the plywood. Don't worry if you don’t own one—many hardware stores offer tool rentals.
- Sandpaper: To smooth out any rough edges and prevent splinters.
- Black Paint: To give our reindeer that sleek, night sky outline.
- Outdoor Christmas Lights: I recommend LED lights for their durability and energy efficiency. Repurposing old lights can be a creative and eco-friendly option here.
- Staple Gun: This will help attach the lights securely to the plywood.
- Extension Cord: Depending on where you plan to display your creation, you might need this to connect to a power source.
- Template or Drawing: For those of us who are not professional artists, a simple reindeer outline can be found online and printed, or you can freehand if you're feeling confident.
With your toolkit ready, clear out some space in your garage or living room, and let’s get crafting.
Creating the Perfect Reindeer Shape: Cutting and Painting
Now, if you’re like me and the idea of drawing a reindeer reminds you of that time you tried to sketch your friend and they ended up not speaking to you for a week, don’t worry. There are plenty of reindeer templates online. Print one out in the desired size, cut out the pattern, and trace it onto your plywood with a pencil. Next, it's time for the jigsaw. (pinterest.com)
Safety glasses on? Check. Jigsaw plugged in? Check. A prayer whispered for good measure? Definitely check. Cutting out the silhouette might take a bit of patience. Go slow, follow your lines, and remember, it’s about the festive spirit (and not losing any fingers).
Once your reindeer shape is liberated from its plywood prison, give it a good sanding to smooth those edges. I learned the hard way that splinters can turn a joyful project sour faster than a burnt Christmas cookie. Next, grab your black paint and give your reindeer a nice, even coat. Allow it to dry completely—this is a perfect time for a cookie break (just don’t burn them this time).
Let There Be Light: Attaching Your Christmas Lights
This part is my favorite—it’s when our reindeer starts to really shine. Begin by planning where you want your lights to go. I like to start from the bottom and work my way up, ensuring even spacing and that all parts of the reindeer are nicely highlighted. Secure the lights with a staple gun. Remember to keep the staples away from the wires to avoid any Clark Griswold-style electrical mishaps.
Pro-tip: Plug in the lights before you start attaching them. This way, you can see how they look as you go and adjust if necessary. It also prevents the sinking feeling you get when you’ve finished stapling everything down only to realize half the strand is burnt out.
If you enjoy getting technical, consider how your project could evolve into a custom display synced with music—a next-level step for the ambitious decorator!
Setting Up and Showing Off Your DIY Masterpiece
You’ve done it! Now, all that’s left is to find the perfect spot for your reindeer. If you're setting it up outdoors, make sure it's securely anchored—nobody wants to chase their DIY project down the street on a windy December night. If indoors, find a spot where it won’t block traffic but still gets plenty of attention.
Connecting it to a power source might need an extension cord. Ensure everything is safe and that cords aren’t creating tripping hazards. Safety first—let’s make sure the only trips taken are those down memory lane when you tell the story of how you created this fabulous piece.
For a beautiful complement to your reindeer display, check out how wood cutouts can support outdoor light shapes for other festive DIY ideas.
Final Thoughts: Embracing the DIY Spirit
Engaging in DIY projects like making a reindeer silhouette not only sparks personal creativity but also adds a uniquely personal touch to your holiday decor. Each time you light it up, you’ll remember the fun (and maybe the small missteps) you had while creating it. This isn't just a decoration; it’s a memento of your effort and festive spirit.
So, why not invite friends or family for your next crafting adventure? While DIY might stand for “Do It Yourself,” it’s often more enjoyable and memorable with a little company.
What about you? Ready to light up your holidays with a DIY reindeer? Or if you’ve tackled a similar project before, what tips can you share? Either way, let’s keep spreading the holiday cheer, one bright, homemade decoration at a time.
Subscribe to our email newsletter and unlock access to members-only content and exclusive updates.

Comments