Lights, Camera, Action—Creating Your Own Oversized Yard Ornaments
Last year, as I wandered through my neighborhood admiring the twinkling lights and festive decorations, I stumbled upon something extraordinary. One of my neighbors had crafted these enormous, glowing ornaments that looked like they had leaped right off a Christmas parade float. They were bright, cheerful, and frankly, show-stoppers. So, this year, I decided it was my turn to create that magic. Let me take you through the surprisingly simple process of making your own oversized yard ornaments that will light up not just your yard, but also the faces of those who see them. (reddit.com)
The Blueprint: What You'll Need to Start
Before diving into the glitter and lights, it’s crucial to gather all the necessary materials. Here's what you'll need to start your project:
- Balloons or large inflatable balls: These will form the base of your ornaments.
- String: You’ll use this for the papier-mâché process.
- Wallpaper glue or craft glue: This will hold your string in place.
- Craft paint: Choose bright, festive colors that stand out.
- Brushes, and potentially a paint sprayer: For applying color to your creations.
- Lights: Either LED strips or small outdoor-safe lights to make your ornaments glow. For a more advanced lighting setup, you might even explore designing and programming Arduino-based light shows.
- Outdoor-safe varnish: This is crucial to protect your ornaments from the weather.
My first go at this involved a bit of trial and error. Initially, I underestimated the amount of string I’d need, and halfway through, I found myself running to the store in my paint-spattered clothes. Save yourself the trip and buy more string and glue than you think you’ll need!
Step-by-Step Guide: Crafting Your Oversized Ornaments
Step 1: Inflate and Wrap
First up, inflate your balloons or balls to the desired size. I chose varying sizes for a more dynamic display. Next, dip your string in glue (a messy but fun process) and start wrapping it around your balloon. Cross and overlap the strings to create a tight web; this structure will support the lights and paint later on.
Step 2: Let it Dry
Patience is key here. Let your balloon dry completely, which might take a day or longer, depending on the humidity. I rushed this part with my first attempt and ended up with a saggy ornament—not the festive spirit I was going for!
Step 3: Paint and Protect
Once dry, it's painting time! I opted for a classic shiny red with a golden stripe. Here, a paint sprayer is a game-changer—it gets the job done quickly and evenly. After the paint dries, apply a coat or two of outdoor-safe varnish to protect your ornament from the elements.
Step 4: Lights, Please!
Now, for the most magical part: adding lights. String your LED lights or push your outdoor-safe lights inside the hollow of the ornament. Ensure the lights are evenly distributed to avoid dark spots. This part really brings your ornament to life in the evenings. Make sure all electrical connections are safe and well insulated, as safety comes first. If you're looking for other lighting ideas, you might enjoy how to create a DIY projector light from LED strips.
Installation and Maintenance Tips
Installing these ornaments can be as simple as hanging them from tree branches or mounting them on poles throughout your yard. If you’re hanging them, make sure the supports are sturdy; these ornaments aren’t particularly heavy, but a winter storm can come with strong winds.
- Maintenance Tip: Check on your ornaments regularly, especially after bad weather. Keep an extra can of varnish handy for touch-ups.
- Extra Tip: Try using a timer for your lights, so they automatically turn off and on. This is not only convenient but also energy efficient.
Last year, amidst a particularly frosty December, I learned the hard way that a touch-up right before the season kicks off can make a big difference. One of my ornaments had a bit of peeling paint because I skipped the second coat of varnish—don’t be like me!
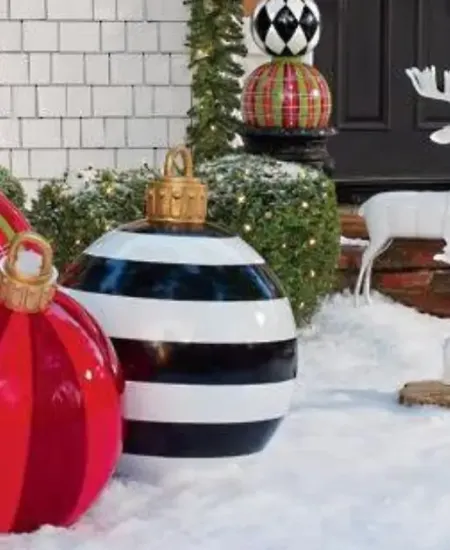
A Look That Brings Joy Night and Day
When I switched on the lights for the first time, the effect was pure Christmas magic. The glow from the oversized ornaments lit the whole yard and suddenly, it wasn't just another decoration; it was a winter wonderland.
This project not only brightened my yard but became a neighborhood sensation—kids and adults alike would stop and marvel. And isn’t that what the holiday season is about? Creating moments of joy and surprise for others, and perhaps, reigniting our own sense of wonder.
So, whether you’re a crafty veteran or a first-time DIYer, consider adding this project to your holiday preparations. It's a delightful challenge with a stunning payoff. For other creative outdoor ideas, consider exploring how to repurpose old lights into new DIY decorations or building your own outdoor nativity scene.
Let’s make spirits bright, one oversized lighted ornament at a time. Happy decorating!
Subscribe to our email newsletter and unlock access to members-only content and exclusive updates.
Comments