The Bright Side: Installing Exterior Christmas Lights Safely and Without Damage
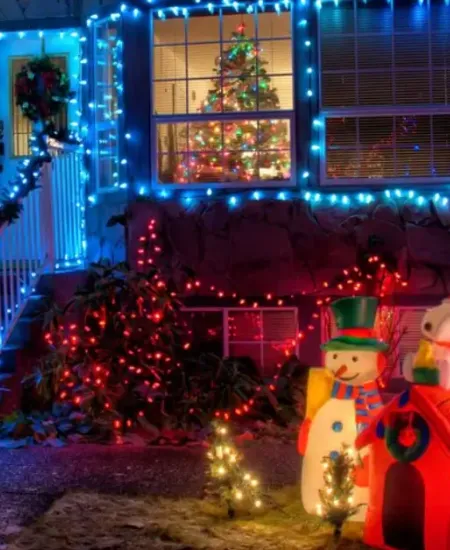
Nothing spells holiday cheer quite like the glow of Christmas lights lining rooftops and wrapping around trees. However, getting them up there can be tricky, and doing it wrong could potentially damage your home. If you're anything like me, then you might still vividly remember the year I turned my home into a blinking cautionary tale rather than a winter wonderland. I learned a lot since then, so let me share some insights on how to do this without hurting your house or your holiday spirit.
Understanding Your Lighting Materials
Before we get into the nitty-gritty, it's essential to know what you're working with. Outdoor Christmas lights aren't just about picking your favorite colors; you also need to ensure they're suited for the job.
Different Types of Lights: LED lights are your best bet. They're energy-efficient, emit less heat, and are more durable compared to incandescent bulbs. Laser lights are another great, hassle-free option that can cover a large area without the need for numerous light strands.
Check for Ratings: Ensure your lights are certified for outdoor use. Look for labels marked "outdoor" or "indoor/outdoor" to be sure. It's all about being safe and ensuring the lights can withstand winter's moisture and temperature changes. (blog.axcethr.com)
For more on matching the right lights to your space, especially for varied surface types, check out this guide to installing lights on brick, stucco, or vinyl siding.
Tools and Materials You'll Need
Gathering all necessary materials beforehand can save you halfway-down-the-ladder trips to the garage. Here’s what I generally keep in my toolkit:
- Light Clips: Choose the right clips for your type of gutter or shingles. These are lifesavers that keep you from having to use nails or screws. (mcclellandsroofing.com)
- Ladder: Ensure it’s sturdy and tall enough to comfortably reach your eaves without you standing on the top rung. Learn more about how to use ladders safely.
- Measuring Tape: To measure light string length against the area they will be covering.
- Gloves: For protection and better grip.
- Timer or Smart Plug: For automatic lighting control, saving you from the daily on-and-off hassle.
These tools do more than just protect your home; they make the installation process smoother and safer. I learned the hard way one icy evening that slipping with a handful of lights can be both embarrassing and painful!
Step-by-Step Guide to Hanging Your Lights
Step 1: Plan Your Design
If you're anything like me, you might be tempted to just wing it. However, a bit of planning can ensure that your home looks thoughtfully festive rather than like a light bulb explosion. Sketch out where you want your lights to go and calculate the lengths you'll need. This avoids the frustration of running out of lights halfway through or, worse, overloading a circuit.
Step 2: Prepare the Surface
Clean your gutters and eaves before anything goes up. Not only does this help with securing the clips firmly, but it also prevents you from festooning dirt and debris with holiday cheer. Trust me, icicle lights dangling from clumps of wet leaves have no one dreaming of a white Christmas. (dryhome.com)
Step 3: Install Clips and Start Hanging Lights
Attach your light clips securely along your gutters or shingles based on your planned design. Then, gently place your light strings in the clips. I found that rushing through this step only leads to tangles and the possibility of pulling everything down when you try to fix a sagging strand.
Step 4: Electrical Connections and Safety
Make sure your outlets are GFCI (Ground Fault Circuit Interrupter) equipped to handle outdoor electrical loads safely. I recommend connecting lights to an outdoor-rated extension cord that runs to your GFCI outlet. Definitely avoid daisy-chaining multiple extension cords, and keep connections away from pooled water or snow. (thisoldhouse.com)
Final Checks and Enjoying Your Handiwork
With everything in place, it’s time for one last inspection. Walk around your home and check that every light strand is securely fastened and that there are no loose cords to trip over or snag. If you need help keeping everything neat, here are some great tips for hiding cords within your festive decor. Once you’ve ensured everything is safe, light ‘em up and bask in the joyous glow of your hard work. (castleelectric.biz)
As the sun sets early and your home sparkles under the twinkling lights, you'll not only feel a sense of accomplishment but also spread joy to everyone who passes by. Remember, the process might be a bit painstaking, but the result is always worth it—especially when accompanied by smiles, photos taken by admirers, and the personal satisfaction of a job well done.
Installing exterior Christmas lights safely is about preparation, having the right tools, and taking your time. I learned through years of trial and error, and these tips were born from both minor disasters and major light bulb light-up moments. Go forth, decorate, and turn your home into a festive beacon without a hitch this holiday season!
Heartfelt Takeaway
Each strand of light is not just a decoration but a beacon of warmth, hope, and holiday spirit. As you power on your Christmas display, remember you're lighting up more than just your home; you're brightening everyone's day. So do it safely, wisely, and with a lot of heart. Happy holidays and happy decorating!
Subscribe to our email newsletter and unlock access to members-only content and exclusive updates.
Comments