Mastering the Art of Light Clips for a Winter Wonderland
There’s something magical about seeing a house all lit up during the holiday season. The twinkling lights against the crisp, winter air just feels like a cup of hot cocoa for the soul. But if you’ve ever tried to hang those lights, you know it can quickly turn into less of a winter wonderland and more of a tangled nightmare. I remember the year I decided to go all out with my outdoor Christmas lights, armed with nothing but good intentions and a whole lot of electrical tape. Let's just say, things could have been less wonky.
Enter the hero of our holiday decorating saga: light clips. These little gadgets can make or break your decorating experience. Today, I'll walk you through how to use light clips for a clean and secure installation of your holiday lights, along with some personal insights and tips that will have you lighting up your block like a pro.
The Basics of Light Clips: Which Type Do You Need?
Before you start untangling those strands of lights, let's talk about the types of light clips available. It turns out, not all clips are created equal, and selecting the right type can save you a lot of frustration.
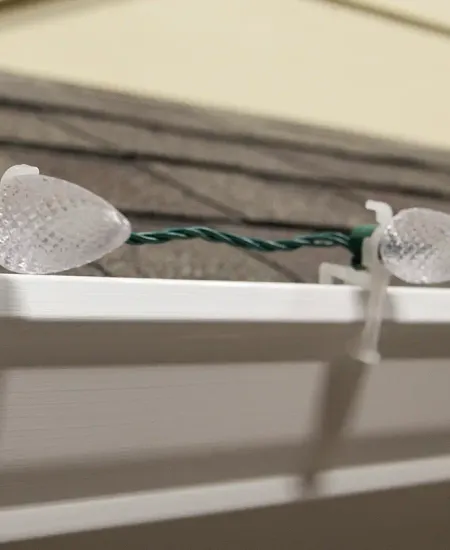
- All-Purpose Clips: These are the Swiss Army knife of light clips. They fit most gutter, shingle, and roof types and hold a variety of light sizes, from mini lights to larger C-series lights.
- Gutter Hooks: Perfect if you want to hang your lights directly on the gutter. They’re super easy to install but make sure they fit your light type.
- Shingle Tabs: Ideal for attaching lights to your roof’s shingles. These provide a neat, vertical display.
- Adhesive Clips: A go-to for those who shudder at the thought of making any holes. These work well on flat, smooth surfaces.
If you’re attaching lights to architectural details like rooflines, make sure you're doing it safely—this guide on how to mount lights on gutters without causing damage offers excellent tips.
Last year, I tried shingle tabs for the first time. Unlike my previous attempts with generic nails (which left my shingles looking pretty sad after the holidays), these tabs clipped on easily and left no trace post-season. It was a game-changer.
Step-by-Step: Installing Your Lights with Ease
Now that we’ve matched our clips to our light types and decided where we want to decorate, it's time to get to the fun part. Let’s hang some lights!
Preparation Is Key
Measure twice, clip once. Measure the areas where you'll hang your lights and include a little extra for wiggle room. Make sure your lights work before you start hanging them up—there’s nothing worse than hanging your entire display only to find out one bulb’s out and now the whole series doesn’t work.
Attaching the Light Clips
Depending on the type of clip you’ve chosen, the installation will vary slightly. (blog.1000bulbs.com)
However, the universal rule is: Don't rush! Here's how I do it:
- Loading the Clips: Attach your light clips to the light strand before you start hanging. This makes it easier to clip them onto your gutters or shingles as you go.
- Start at One End: Begin at the closest point to your power outlet. This will help in minimizing the extension cords visible along your house’s façade.
- Space Out: Place clips about 12 inches apart for a clean, uniform look. Adjust spacing according to the weight and length of your lights to avoid sagging.
The first time I tried putting the lights up clip-by-clip, piece-by-piece, I nearly lost my mind. Attaching the clips to the string in advance seriously cut down my roof time, which is great because it left more time for cookie baking!
Dealing with Different Surfaces
Every house is unique, so here’s some tailored advice for those tricky spots:
Brick Surfaces
For brick, magnetic or adhesive clips will be your best bet. Adhesive ones need a flat surface, so aim for the mortar. Just be sure to remove them slowly and carefully at the end of the season to avoid damage.
Wood and Siding
If your home has siding, use siding clips. These nifty clips slide between the gaps of the siding, no drilling needed. They hold pretty well even in the worst of winters we’ve had.
That Little Bit Extra: Safety Tips
Do you remember that scene from ‘National Lampoon’s Christmas Vacation’ where Clark Griswold goes a bit...overboard with his decorations? Hilarious, yes, but let's avoid any real-life repeats:
- Use a sturdy ladder, and always have someone spot you. Solo missions can end up in slapstick accidents that are only funny in movies.
- Opt for LED lights. They’re more energy-efficient and less likely to overheat than traditional bulbs.
- Connect strings of lights to an extension cord off the ground to keep connections away from snow and water puddles.
You can further optimize your setup by pairing your display with outdoor light timers or creating lighting zones for even more control and energy efficiency.
When I swapped to LED lights, not only did it feel safer, but seeing my electricity bill post-holidays didn’t give me a heart attack, so double win!
Wrapping Up: Enjoy Your Sparkling Creation
After you hang up your last strand of lights and step back to admire your work, there’s a real moment of pride. It’s more than just making your home festive; it’s about creating joy and brightening the dark winter nights. Whether you’re a seasoned pro or a first-timer, remember to take a step back and enjoy the view. Then, grab a warm drink, gather your loved ones, and soak in the glow of your handiwork.
And hey, if you have tips or epic fail stories of your own, drop them in the comments. We’re all in this holiday cheer together, after all!
Subscribe to our email newsletter and unlock access to members-only content and exclusive updates.
Comments