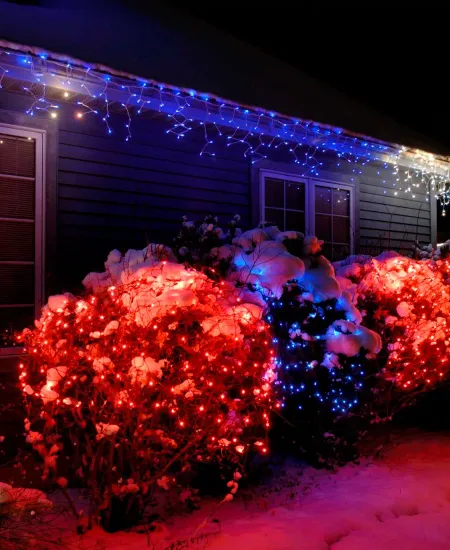
Turning Your Garden into a Twinkling Wonderland
Imagine stepping out into your garden as dusk falls, the air crisp and the sky just dark enough to make the stars jealous of your ground-level cosmos. This scene might seem straight from a festive movie, but it’s utterly achievable. Whether you’re gearing up for the holiday season or just want to add some sparkle to your summer evenings, installing lights on your bushes and hedges can transform your outdoor space into a magical landscape.
I remember the first time I tried to adorn my garden with fairy lights; let’s just say it was more of a tangle than a twinkle. Over the years, I’ve picked up a trick or two about how to do it right—saving both time and sanity. If you wish to avoid similar first-time mistakes, check out these common setup mistakes and how to prevent them. Here’s how you can light up your garden with ease and make sure it's the highlight of your street!
Here’s how you can light up your garden with ease and make sure it's the highlight of your street!
Getting Started: Choosing the Right Lights
Before you charge outside, basket of lights in hand, knowing what you’re working with is essential. Not all lights are created equal, and some are specifically designed for outdoor use.
- LED Lights: These are my go-to for garden lighting. They’re energy-efficient, long-lasting, and available in a variety of colors and brightness levels. (kichler.com)
- Solar-Powered Lights: Perfect for reducing power consumption, these lights charge during the day and light up as night falls. Ideal if you have a sunny garden. (architecturaldigest.com)
- Connectable Lights: These can be a lifesaver if you have a large garden. You can connect multiple strands together from one power source—no need for dozens of extension cords!
Picking the right type of light will affect everything from the ambiance of your garden to your electricity bill. My personal favorite? Warm white LED lights—they give off a cozy, inviting glow that's perfect for any season. If you wish to make your lighting setup even more efficient, you might want to look into creating lighting zones.
Preparing Your Canvas: Bushes and Hedges
If you’re anything like me, the thought of untangling lights is less appealing than a dentist appointment. Here’s how I make sure that doesn’t happen:
- Measure: Nothing's worse than getting halfway through decorating and running out of lights. Measure your bushes and hedges first to know how many meters of lights you’ll need. (weekand.com)
- Prune: Trim any overgrown branches. Not only does this help with the aesthetics, but it also makes wrapping the lights easier and safer by removing potential hazards.
- Plan: Decide on your lighting style. Do you want a gentle glow or a dazzling display? This will determine how densely you wrap the lights around each branch. If you wish to avoid future headaches when taking your lights down, consider these tips on taking down lights without tangling.
I've found that doing a little pre-planning saves a lot of backtracking and re-wrapping (which I learned the hard way during my first attempt).
The Fun Part: Installing the Lights
Now, for the moment you’ve been waiting for—turning those dark bushes into glowing beauties. Follow these steps to ensure your lights are both beautiful and secure:
- Start from the Bottom: Begin at the base of your bushes or hedges, nearest to your power source. It’s easier to work your way up and outwards.
- Use the 'In and Out' Method: Push a strand of lights toward the center of the bush, then bring it back out. Repeat this weaving action for even coverage.
- Secure the Lights: Use garden staples or zip ties to secure the lights, especially in windy areas. Be gentle; tight ties can damage the wires.
- Connect Strategically: If you’re using connectable light strands, plan your route to minimize visible wires and maximize the fairy-tale effect.
Patience is your best friend here. Rushing might get you tangled up or leave you with uneven lighting, which can dim the magical effect (speaking from experience).
Final Touches and Safety Checks
Once you’ve got all your lights in place, it’s time to take a step back and admire your work. But before you switch them on, here’s a quick safety checklist:
- Check for Exposed Wires: Ensure that none of the cables are frayed or exposed to prevent any short circuits.
- Weatherproof: Confirm that all connections and extensions are weatherproof, especially if you’re using non-solar options.
- Even Coverage: Walk around your garden and view the lights from different angles to spot any patches that might need a quick fix.
The unveiling moment is always thrilling—watching everything light up for the first time is genuinely enchanting.
Wrapping up with a Cozy Glow
Seeing your garden bright and merry not only uplifts spirits but can also be a beacon of joy for your neighborhood. Something as simple as installing lights properly can bring immense satisfaction and even become a festive tradition. I recall the silly grin I wore when I saw my handiwork illuminate my garden for the first time—it felt like I’d sprinkled a little bit of starlight right in my backyard.
Whether you prep for Christmas or just want some twinkling charm all year round, lighting up your bushes and hedges adds warmth and magic to your home. It’s about creating moments and memories—those lit-up gardens are often where stories begin, right? So grab your lights, plan your attack, and create a landscape that glows. Who knows? It might just be your next tradition. (ft.com)
If you wish to make your next setup even smoother, consider planning ahead with these tips on storing your outdoor lights.
Remember: The glow of well-placed lights not only enhances the beauty of your home but also the smiles of those who see it. Happy lighting!
Subscribe to our email newsletter and unlock access to members-only content and exclusive updates.
Comments