Lighting Up the Holidays: A DIY Guide to Creating a PVC Pipe Light Tunnel for Your Driveway
Imagine driving up to your home during the festive season, and your driveway is lit up, not just by any lights, but by a captivating tunnel of glowing colors that warmly welcomes everyone. It's magical, right? Well, get ready to turn that imagination into reality. I’m taking you through a journey of creating a PVC pipe light tunnel that’ll make your driveway not just a path to your house, but a grand entrance to your holiday celebrations.
But first, a little backstory. Last Christmas, I was totally blown away by a neighbor’s driveway that looked like a portal to Santa’s workshop. I mean, who wouldn’t be? It was downright enchanting. That’s when I decided it was my turn to step up my holiday decor game. With a bit of research and a whole lot of trial and error, I learned not just how to make a light tunnel, but how to make it stand out. And guess what? It’s easier than you think, and yes, you can totally DIY this project over a weekend. Let’s dive in!
What You'll Need to Get Started
Before you roll up your sleeves, let's make sure you have everything you need. Here’s a handy list I wish I had when I started my first tunnel:
- PVC pipes: These will form the frame of your tunnel. The quantity will depend on the length and height of your desired tunnel.
- Steel rebar pieces: These will anchor your PVC arches to the ground—super important for stability.
- Connectors and PVC cement: You’ll need these to piece together your pipes, unless you’re opting for a snap-together design.
- String lights: This is where the magic happens. Choose lights that are suitable for outdoor use. LED string lights are perfect due to their durability and energy efficiency. (nytimes.com)
- Zip ties: To secure your lights to the PVC pipes.
- Measuring tape, a saw, and safety gear: Basic tools to measure and cut your PVC pipes to size, and to keep you safe while doing it.
Got everything? Great! Now, let's move to the fun part—building your light tunnel!
Building Your Frame: The Base of Your Light Magic
The frame is what gives your light tunnel its structure and, understandably, it’s vital to get this part right. Here’s a simplified breakdown of the steps:
1. Measure Your Space: Start by measuring the length and width of your driveway. This will determine the necessary size and number of PVC pipes.
2. Cut and Assemble: Based on your measurements, cut your PVC pipes to create equal-sized arches across your driveway. Use connectors to assemble these arches at regular intervals.
3. Anchor: Drive the steel rebar into the ground at both ends of each arch, slipping the ends of the PVC pipes over them to secure the structure. This step made all the difference for me—no wobbling arches!
4. Check Stability: Walk around your arches and gently shake them to make sure they’re planted firmly. You don’t want a windy day turning your light tunnel dream into a pickup-sticks scenario.
With the frame sturdy, you’re set to move on to the star of the show: the lighting!
Stringing Along: Lighting Up Your Tunnel
Now, this part you’ll love. It’s pretty straightforward, yet it transforms your basic frame into a stunning holiday masterpiece. Here’s how to nail it:
1. Plan Your Design: Decide how dense you want your lights. Do you want a cozy, starlit feel, or are you going for maximum brightness? Layout your lights on the ground first to sketch out your design.
2. Attach the Lights: Start stringing your lights along the arches, using zip ties to secure them at regular intervals. Ensure that every light strand is tightly and neatly attached to avoid drooping.
3. Power Source Matters: Make sure you have access to an outdoor-rated power source. If needed, use a heavy-duty extension cord that can handle the load and weather conditions.
4. Testing Time: Once everything is set, plug in your lights to test. This moment—when you switch on the lights for the first time—is pure joy. Trust me, you’ll want to keep that camera ready!
Tips and Tricks for a Dazzling Display
Here are a few nuggets of wisdom I learned through (a lot of) trial and error:
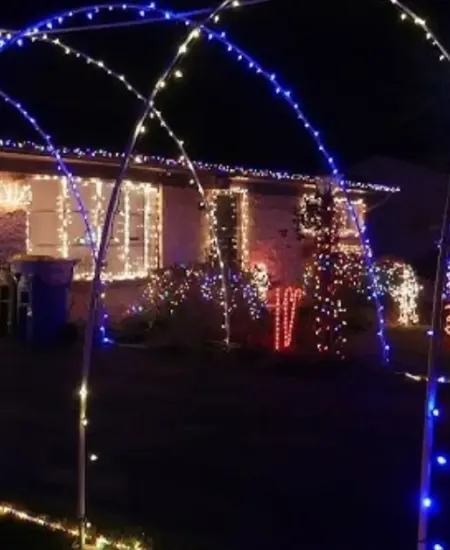
- Vary the light colors: Mix cool and warm whites or throw in some colors for depth and interest. Last year, I did a combo of icy blue and white that mimicked a frozen wonderland!
- Layer your lights: Use different sizes and types of lights for a fuller, richer look. Small fairy lights with some bigger bulbs in between can add a delightful variety. For more inspiration, check out how to make a giant snowflake with LED rope lights to complement your tunnel design.
- Keep safety in mind: Always use lights rated for outdoor use and make sure all connections are secure and moisture-proof.
- Think about the environment: Opt for LED lights. They’re not only energy-efficient but also brighter and longer-lasting than traditional bulbs.
If you enjoy building displays like this, you might also like building a lighted archway for your sidewalk or entry or even creating custom light displays that sync with music for a show-stopping effect.
Building a PVC pipe light tunnel might seem daunting at first, but with the right tools and a bit of patience, it’s an incredibly rewarding project. Not only does it elevate your home’s curb appeal, but it also crafts a special kind of holiday joy that only homemade projects bring. Share this guide with friends or family who love DIYing as much as we do, and let’s spread the holiday spirit one light tunnel at a time!
Subscribe to our email newsletter and unlock access to members-only content and exclusive updates.
Comments