The Ultimate Guide to Using Zip Ties and Hooks for Secure Light Displays
Imagine the scene: you’ve spent hours carefully planning your Christmas light display, meticulously placing each strand to showcase a twinkling, magical landscape. It’s your personal contribution to the holiday spirit, and you can’t wait to share it. But then, the wind picks up, and suddenly, you’re watching your hard work fall apart, literally. If only there were a way to keep everything securely in place without turning it into a full engineering project, right?
That’s where the humble zip ties and sturdy hooks come in—unassuming heroes of holiday decorating. Let me walk you through how these simple tools can transform your decorating experience, ensuring your lights stay just where you want them, regardless of what winter throws your way.
The Basics of Zip Ties and Hooks
Before diving headfirst into the intricacies of outdoor lighting security, let’s establish what zip ties and hooks actually are. Zip ties, also known as cable ties, are fastening devices that provide a quick, efficient method of bundling together cables and ensuring that objects are securely tied down. On the other hand, hooks come in various forms and materials, tailor-made for clinging onto different surfaces without causing damage.
Now, why do these matter? In the realm of holiday decorating, particularly with lights, the blend of durability and simplicity they offer is invaluable. Here’s a brief rundown of each:
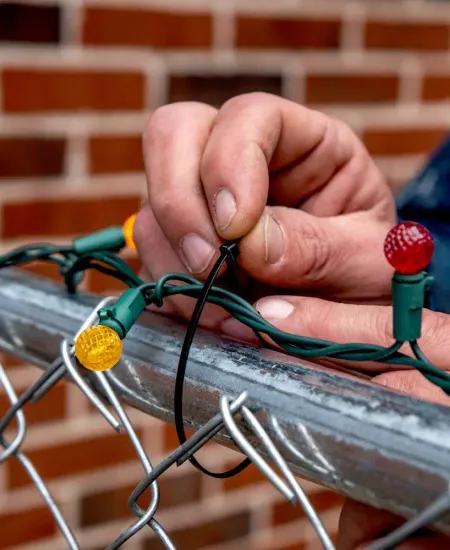
- Zip Ties: Highly durable, available in various lengths and colors, and best for lights along fences or railings.
- Hooks: Perfect for non-invasive installations on mantles, roofs, or gutters, with removable options available to avoid leaving marks post-season.
If you wish to learn more about clean and damage-free installations, check out this guide on light clips.
Choosing the Right Type
Not all zip ties and hooks are created equal, especially when it comes to enduring the great outdoors. For those of us living in places where December feels more like a preview of the Ice Age, materials and durability become particularly crucial.
For zip ties, UV-resistant options are a must if they are to survive under the harsh winter sun. These ties won't degrade or lose their tensile strength as quickly as their regular counterparts, making them a wise choice for outdoor use. Similarly, for hooks, sticking to weather-resistant materials like stainless steel or durable plastic will ensure they hold up under weight and weather.
Here’s what to keep in mind:
- Material Matters: Choose UV-resistant zip ties and weatherproof hooks.
- Color Coordination: Match the zip ties with your decorating theme or opt for clear ties for minimal visibility.
- Strength and Size: Ensure the zip ties and hooks are strong and large enough to hold your lights securely, particularly in windy conditions.
If you wish to weatherproof your entire display from the start, this guide to weatherproofing your light display might come in handy.
Installing Your Lights with Zip Ties and Hooks
Ah, the actual setup—the part where theory meets practice. Here’s the step-by-step breakdown:
Step 1: Planning Your Layout
Before you start tying and hooking, plan out where each strand of lights will go. This not only saves time but also prevents the frustration of having to redo your layout because the lights didn’t reach the power source or looked uneven.
Step 2: Attaching Hooks
Begin by placing hooks at strategic points where light strands need support. Ensure you measure distances correctly to avoid unnecessary stretching or sagging of lights.
Step 3: Securing with Zip Ties
Once your strands are draped over the hooks or along the desired path, use zip ties to secure them at various points. This is crucial for long stretches or areas exposed to wind. Snip off the extra tail of each zip tie to keep things neat.
Step 4: Double-Checking
After installing, give your light setup a gentle tug here and there to see if there’s any give. If a section feels loose, reinforce it with an extra zip tie or another hook.
Step 5: Power and Testing
Now, connect your lights to the power source and turn them on to check the effect. Adjust the positioning if needed to achieve the desired aesthetic. If you wish to ensure everything is working properly before installation, follow this helpful guide on testing your lights.
Troubleshooting Common Issues
Despite the best-laid plans, issues can arise. Maybe a zip tie is too tight, cutting into the wire insulation, or a hook wasn’t as secure as you thought. (ask.metafilter.com)
Here’s how to troubleshoot:
- Too Tight: If a zip tie is causing indentation on your light strings, loosen it slightly. It’s crucial not to damage the wires.
- Slippage: For hooks that aren’t holding, ensure you’re using the right type for the surface or consider switching to a more suitable type.
- Uneven Hanging: Adjust the spacing between hooks or add more to support sagging sections.
A Few More Tips
Here are a few extra tips to ensure your display remains as magical as intended:
- Maintain Regularly: Check your light setup periodically throughout the season to tighten any loose zip ties and secure any hooks that may have moved.
- Be Generous with Support: It’s better to over-secure than to watch your lights come tumbling down. Whenever in doubt, add an extra zip tie or hook.
- Plan for Removal: Use zip ties and hooks that are easy to remove or cut away when the season ends. This will make your post-holiday cleanup far less of a headache.
The Final Touch
Keeping your Christmas lights secure isn’t just about aesthetics; it’s about ensuring that your festive spirit isn't dampened by a windy winter’s night. Zip ties and hooks, simple as they may be, can be your best allies in creating a holiday display that stays beautiful and bright throughout the season. This year, let your light shine unabashedly bright, secure in the knowledge that you've done everything right from the get-go. Happy decorating!
Subscribe to our email newsletter and unlock access to members-only content and exclusive updates.
Comments